Wednesday, March 9, 2016

Tea Cozy for Hot Tea

"STATE-LINE CRAFTER'S"

Tea Cozy for Hot Tea


I attended a Tea party with my Aunt Junie, last year.  The hostess of our table had a tea pot I'd never seen before, it was an Insulated Metal covered Teapot with cork stopper, love it!!   Of course I had to have one! With the insulator it keeps your tea hotter longer, that's awesome.   I priced them online,

brand new they were $100....


A month later I found 

this one at a garage sale, 

$5.  Yes it has cracks in

 the porcelain, but it does

 not leak. Even with the

 insulator on the pot, I

 would like my tea even

 hotter.  


Looking in my Mother's cupboards, I came across one of her tea cozy's, it almost fit my pot perfectly except it need to be longer at the top.

I traced it for the pattern, and made my own.

 
Here's the steps:
  1. https://blogger.googleusercontent.com/img/b/R29vZ2xl/AVvXsEjoXGD8R3QWjeSFkJs3NhDkSiav66u_OFNNx9Ban5j8GHeoqIv_FqCbBn0pApIxa9th6qC-q5uLX3o5Yy3U7x41RFueuGpmKezkSxBNq48tBFE2dM4uNJdGXJchRkyeWDrGyMurTDrto_b_/s1600/1.png   
Cut 2 fabric for sides and cut 1 for bottom. Cut 2 lining and cut 1 for bottom.
https://blogger.googleusercontent.com/img/b/R29vZ2xl/AVvXsEgUsxKHTfEdfUkErRaEWhFXMxy9nz5uSEuV7CXogwB98MbJTfIEEhOXFWu1Zt4D7V5fn1iuOoLDDDJ39YyMs9Gzxs3_QE-szXvpXTlB2dqARDhWKbSUsf5tDsd5iBP1zjvnFl6uXXDMP0Fn/s1600/2.png 
Sew Velcro on both sides of top of each side piece of lining.
 https://blogger.googleusercontent.com/img/b/R29vZ2xl/AVvXsEiDUVfdtI_56AxjamJ4FssT0hptcrMjlxWTXNf8r8c9xKv2ovdu195fpjotOM9S5Oe152FTBxYwZDXEUpyKa_EXuTgN5nqJjCUF7K_uVBkZPklw5dGls6qDjjpEth4mWbiAhmiF7eP4zXYW/s1600/3.png 
Sew 1/4" seam up each side around the top, leaving bottom open.
 https://blogger.googleusercontent.com/img/b/R29vZ2xl/AVvXsEhWUxurOr_aWhxOLUFh739zZxrsgJks2s8II_C_EvUFLfkQ44cjGpNtXOHIQVr1zymDWiX-u5WCmQjY0EgBvIva9KHwJ4AWq1iemY06eOHCNYFId33BQgqYS7VsO2AXV7TjZfPgqpHgBNqj/s1600/4.png 
Cut 2 foam for sides and cut 1 for bottom. Cut 2 batting for sides and cut 1 for bottom. Cut 2 heat bond for sides and cut 1 for bottom.
 https://blogger.googleusercontent.com/img/b/R29vZ2xl/AVvXsEiSiJQHYi8cQC51kyv6p-ndqEn_5HFy5BgQ8Y1EV3fFyIjZrM0c175HV9QvGQNT38t2fFwXcquyKv2OkxkuB1mXc6lEDCrKpQk2S7isiulcuAd6-lNkixxOx0O5g2wFahbPuWZhIrnmQd3h/s1600/5.png 
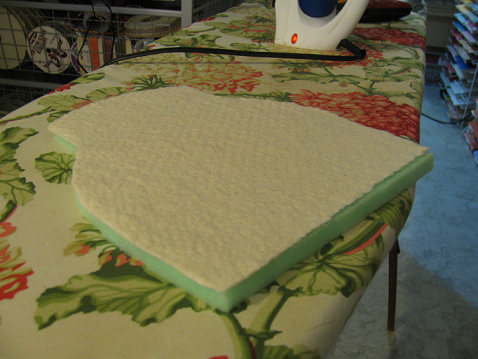
Iron heat bond to batting, iron batting to foam.
 https://blogger.googleusercontent.com/img/b/R29vZ2xl/AVvXsEhCFZ0YsTtyiiubCon0tw67XGh-Seul60Qe1Rit7afGX96UEQGkCK9ZY72ORfM6kO_frliESr3oW5w_CaGq61tCD_1oAnEgdcRSk1MFTLPvbwD6RpElBUeKyiufsSsJLQlyFOdHd-Fy7hHH/s1600/6.png 
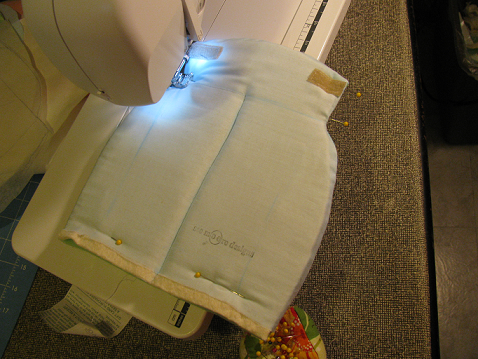
Sew across the top 2" down, then in the middle, and on both sides.  See next photo.
 https://blogger.googleusercontent.com/img/b/R29vZ2xl/AVvXsEjtStdqGWhOm0_CbS9hkhqlXdV-QQN8-1EcoQWhePUPoAjRqwBYdyT6mbqi0yXtf5nPvdK-jIrfA6FE2cHMeP3rDFqO6Rc4PfzsEt6djX8WcwobRmNO9aSuh0C8ZQRuRG-M6b_1_9pXACum/s1600/7.png 
Sew both sides.
 https://blogger.googleusercontent.com/img/b/R29vZ2xl/AVvXsEgiQifNxELSaes6k-rGJPwgrSQTq77sjwkylZ-pM40YCDQVikAyudcxSGVxERM19l_7GHkJdFL2ix8Sic9If_3yxApmsrmsB5XAFZlRKWT62Szo9S7sMus8eLGR4Y0c4ljVeYX_RMCSPE1b/s1600/8.png 
Pin bottom of sides, right sides together, 2" on one side, 1" on the other side.
 https://blogger.googleusercontent.com/img/b/R29vZ2xl/AVvXsEhLFVlTH6TiwY-_0mNTq32jUlKB0KIJhnq0w8-UjqEQ6708Cgs40OAG_Q7Lia4FEDa84CmE4pPIZuxJRd3-0o7weP-hgtMLvKOHimbx2cDasFwAGArV_L7UhwiGFwhsYfX5QglIJE-8nd4n/s1600/11.png 
For bottom piece Iron all layers together, Sew 1/4" around, then zig zag edge.
 https://blogger.googleusercontent.com/img/b/R29vZ2xl/AVvXsEgvD_21aVBb22e4JEm4mTFr6eqF-e0pJv1MYEY5PVEf6VsksRcwQxATSYkrRfdPKEHBhrUPNXi4osF0U8Tjuod9Ue3TGDlVMKZpCldhqjqETUrQnE8o-EmGz53pN8476pFgTEPb9yuaDBtc/s1600/13.png 
Pin sides to bottom, Sew 1/4" around, then zig zag edges.

Insert tea pot!!


Let the tea sipping begin!!
Thank you for joining me,
Happy Sewing!
Also posting on State-line Crafter's.
Parties:  Sunday, Monday, Tuesday: funky polka dot giraffeKathe with an E, Wednesday: Handy Man, Crafty Woman, Thursday, Friday, Saturday.

No comments:

Post a Comment